Marking examinations
A service for teaching staff of the University of Girona that provides the digital correction of multiple-choice type tests using approved page formats, and transmits the results to your e-mail inboxes. The system guarantees delivery of the correction results in less than five days and the custody of the documents.
It is a decentralized procedure that allows you to send us the scan through the printers installed in the faculties/schools and send the correction request online, without the documents having to leave the center.
Download the infographic with the summary of the correction process.
For further information, please do no hesitate to contact us: biblioteca.correctordigital@udg.edu
You can request these from the porter of your school or faculty.
- Multiple-choice tests of up to 100 questions. If the test has more than 100 questions, it must be considered as two different exams.
- The exams will be accompanied by a single answer sheet, the answer key.
- The "EXAM TYPE" or "SHEET NUMBER" options will not be used on the answer sheet. If you are interested in including several titles, you will need to separate them as different exams.
Each question must have a maximum of four possible answers (A, B, C, D) and each question must have a SINGLE valid answer. The total score of the test will always be given to you as a mark out of 10 points.
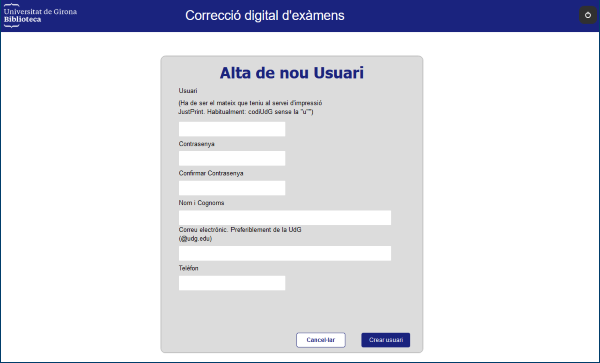
To use the correction service, you must register on the https://correccions.udg.edu/ webpage (for security, access is only available from the UdG Campus).
- You only need to register once.
- Click on the "Register" link and fill in all fields.
- IMPORTANT: Your username must be the same as your username for the JustPrint printing service. It will usually be your UdG code without the “u” (emails are not accepted as a username).
Follow the steps below to send us your scanned exam:
- Log in to the JustPrint service printer.
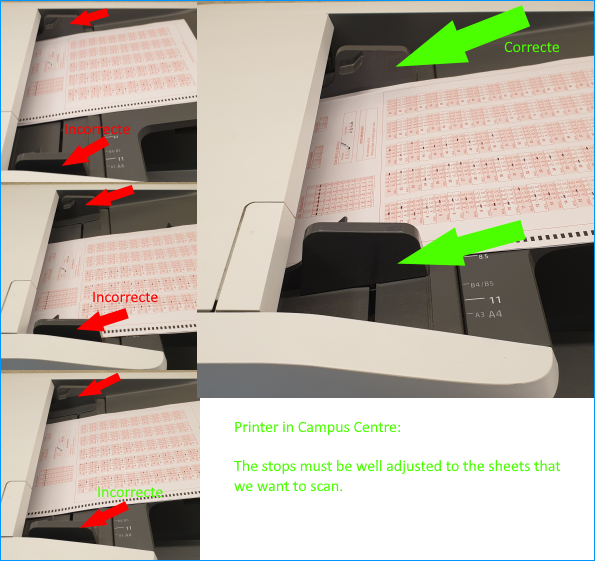
Check the scanning points prepared for the correction service.
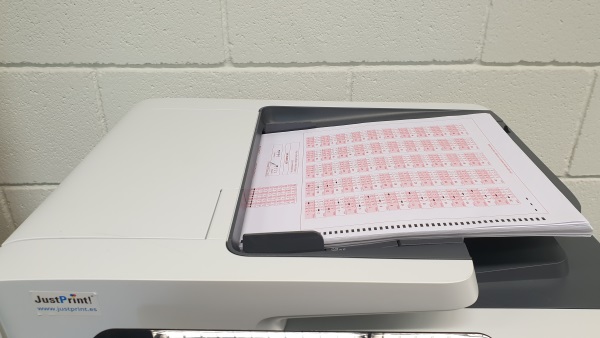
- Place the exam papers in the printer tray:
- The answer key must be the first sheet.
- Check that there are no sheets that are upside-down, wrinkled, or folded.
The papers should be placed face up with the header at the entrance to the tray.
Example:
Printer in Campus Centre (Faculty of Medicine and Faculty of Nursing):
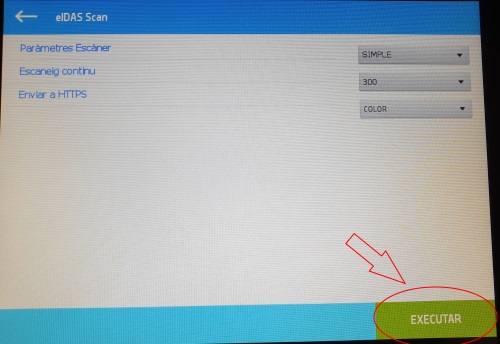
- Click on the eIDAS Scan icon (found on the printer management screen) and start scanning
- Make a scan of each exam. One for each sitting or group.
- If there are more than 100 sheets, add sheets below the last one in the in-tray as they are scanned.
- Wait until the "run" button turns green again. You can either exit and log out at this time, or you can start a new scan.
The total scanning time can be between 3 and 10 minutes depending on the number of sheets (example: 10 minutes for scanning 210 pages)
- After completing each scan, you will receive an email notification with the link to send us the correction request.
Please note that if you are using this system for the first time, you must register on the Corrections webpage before scanning (see the "Correction Service Registration" section)
Approximately 5 minutes after completing the scan, you will be able to log in to the correction webpage to send us the correction request.
- Log in to the corrections webpage (for security access is only available from the UdG Campus).
- You will see a list of your scans.
- For each set of exams, you must fill in the correction data. Observations:
- Only the person who did the scan can fill out the correction request.
- The person scanning does not have to be the person receiving the marks.
- If you are scanning and receiving the marks yourself, you can click the "Copy User Data" button to copy the information from one block to another.
- We will ONLY send the marks to the email of the PDI responsible for the subject indicated in the application.
- You can use the "Notes" field to send us your comments (for example, cancelling questions, sending a copy to one or more people, etc.).
- The "No. of questions" and "No. of students" fields are automatically filled in by the system. Therefore, you do NOT need to complete or modify them.
Access to the corrections webpage (for security, access is only available from the UdG Campus)
Please note that if you are using this system for the first time, you must register on the Corrections webpage before scanning (see the "Correction Service Registration" section)
You must not write, mark, or bend over the position marks that are located in the left margin of the answer sheet. Also, we can only guarantee that black or blue pen will be read.
|
Column |
Entries |
|
DNI |
00000000 |
|
Exam type |
Blank |
|
Sheet no. |
Blank |
|
Questions |
Mark the correct answer for each question. |
- They must use a pencil or a blue or black pen.
- In the "DNI/Passport" field, we recommend that students use their UDG CODE (adding a ZERO to the LEFT, i.e. replace the “u “with a “0”) instead of their DNI/NIF/NIE, etc. This way the digital correction of the exams is faster and generates fewer incidents.
Example:
- Leave the "Exam Type" and "Sheet No." fields blank.
- They must carefully mark the box with the answer they consider correct. The sheet gives examples of incorrect ways of marking the box.
- Incorrect Answer: If they make a mistake, they must mark the same wrong answer in the row ("ANUL.") below the error; this cancels their mistake. Then they must mark the correct answer in the top row. If two boxes in the first row are marked, and the next row has no box marked, the machine will not understand the answer you intend to give.
Example of correct cancellation, with a new answer:

Once the correction is complete, we will send two files to the e-mail you indicated in the correction request: a spreadsheet (Excel) with the results of the correction and a csv format file to be able to upload the marks to Moodle.
The marks will be sent within a maximum of 5 working days.
Characteristics of the two files:
1) The spreadsheet (Excel) with the result of the correction will contain 4 sheets:
Sheet 1: Configuration: The exam settings are detailed in the application form.

Sheet 2: Results: The correct answers related to the record of each student are given, with the total number of correct, incorrect and blank answers and the resulting mark.

Sheet 3: Questions: The summary of the results for each question is detailed. This reports how many have been answered correctly, incorrectly or in blank.

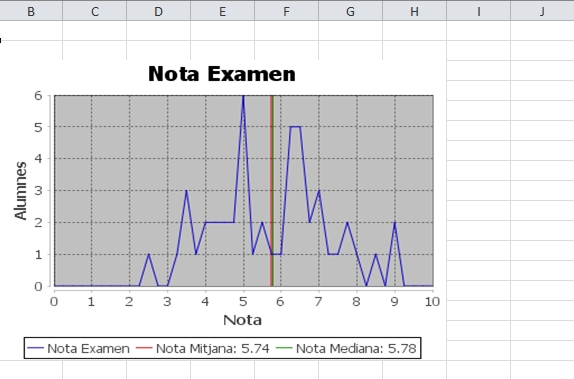
Sheet 4: Graphs: A graphic summary of all the answers is given.
2) CSV file:
- This file will allow you to upload exam marks to Moodle
- Csv file format: 2 columns separated by semicolons (;). The first column corresponds to the student's UdG code and the second column contains the mark (mark out of 10, and the decimals separated by a comma).
- To load the marks into Moodle:
- Go to the section for the course marks.
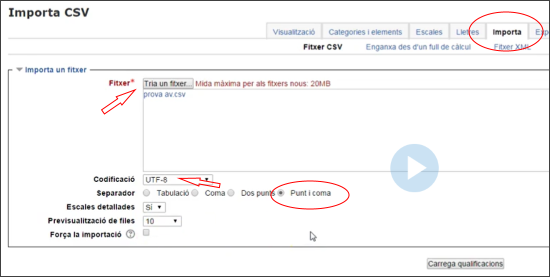
- Go to the "Import" tab, load the .csv file, check UTF-8 in the encoding field and choose the "semicolon" option in the separator field.
Note: For other types of imports, see Moodle manuals available in "La meva UdG"
